🗓️ Workflow Scheduling Guide
This guide explains how to schedule automated runs for selected workflows in your application. You’ll learn how to:- Select workflows
- Create a new schedule
- Update an existing schedule from the calendar view
✅ Step 1: Select Workflows to Schedule
To begin scheduling, first select one or more workflows from the list.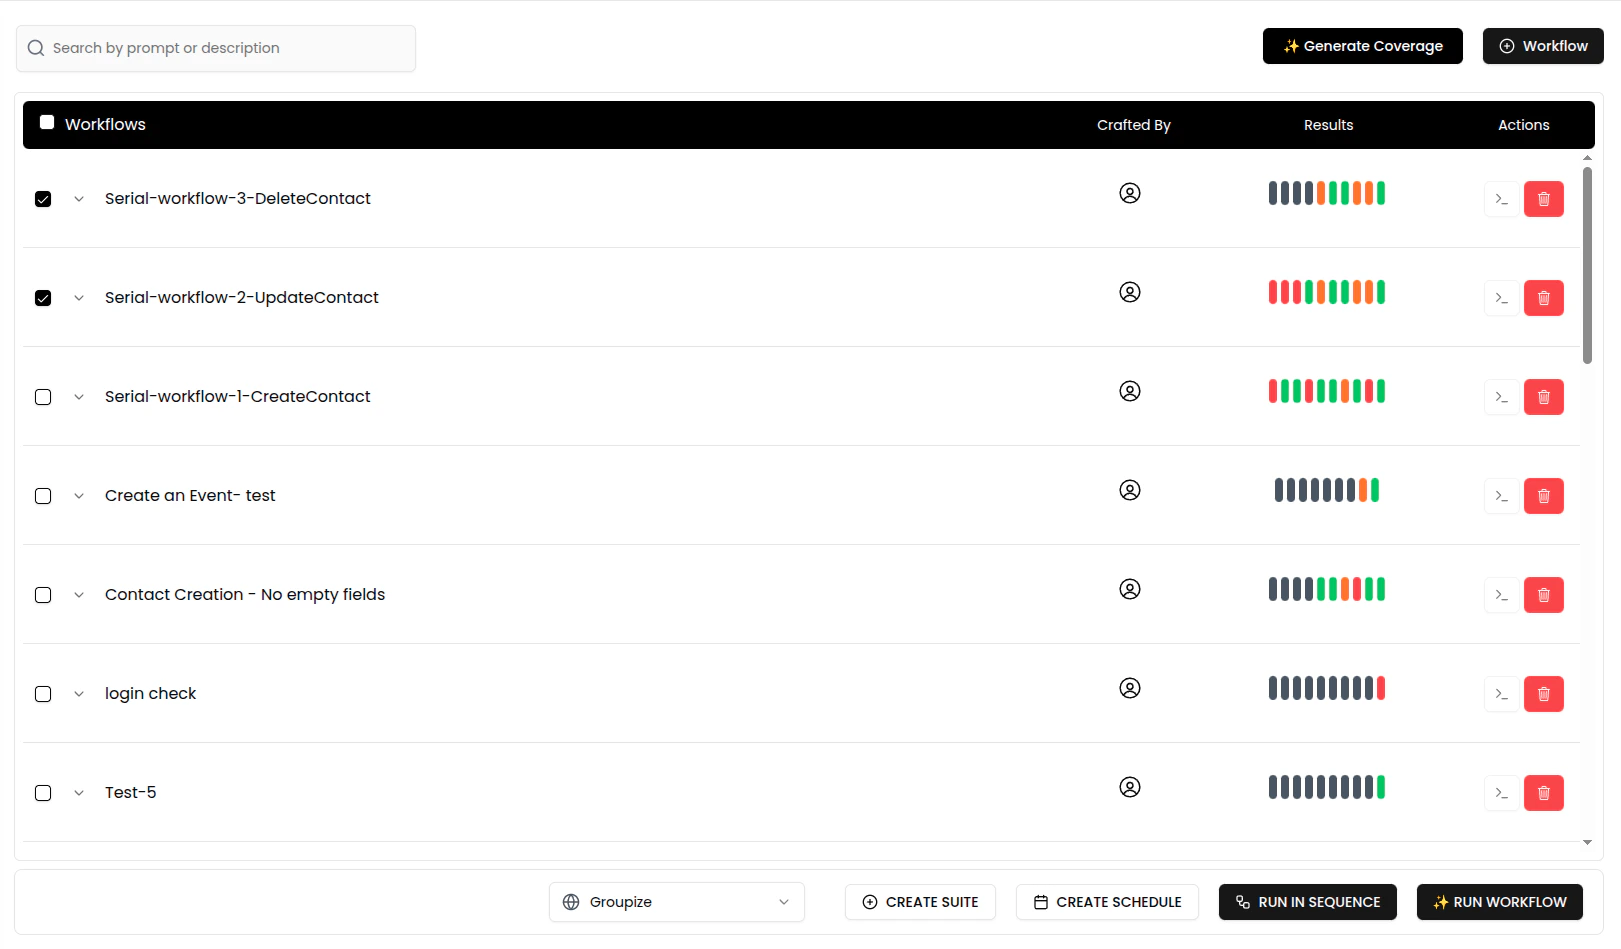
- Tick the checkboxes next to the workflows you want to schedule.
- Use the environment selector at the bottom (e.g.,
dev tour camp) to choose the context. - Click the Create Schedule button to open the scheduling form.
🕒 Step 2: Create a Schedule
Fill out the schedule form to define when and how often the selected workflows should run.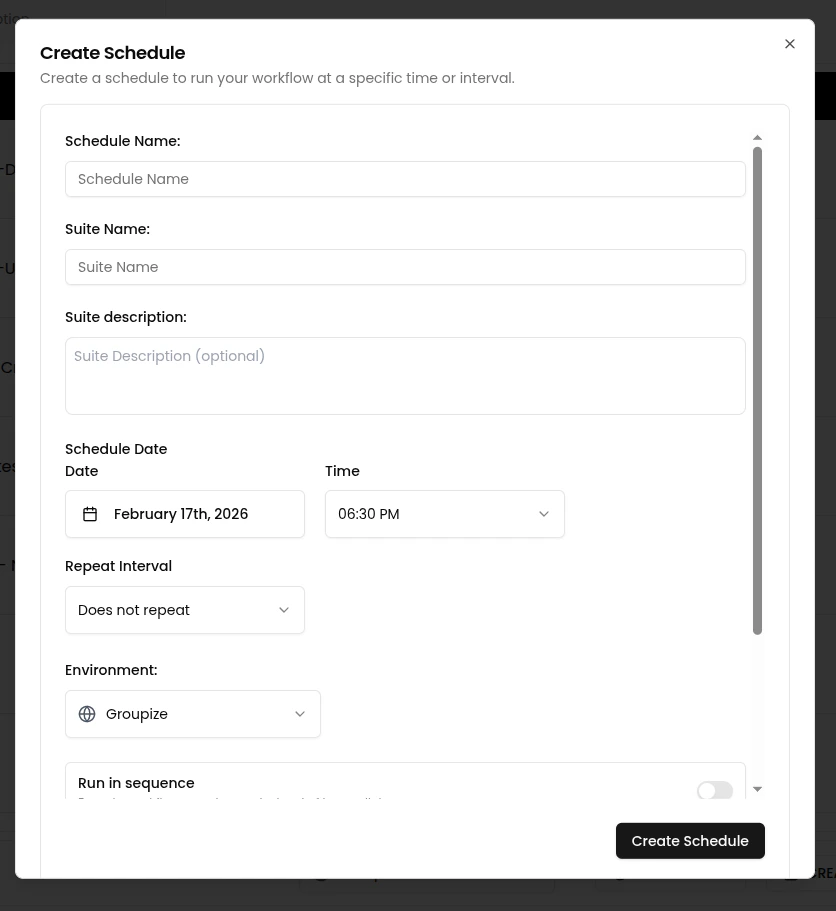
Fields to Fill:
- Schedule Name: A descriptive name for the schedule.
- Suite Name: Logical grouping for the selected workflows.
- Suite Description (optional): Notes or purpose of the schedule.
- Schedule Date & Time: The first run time for this schedule.
- Repeat Interval: Choose from Daily, Weekly, or custom intervals.
- Environment: Target environment where the workflow will run.
Additional Options:
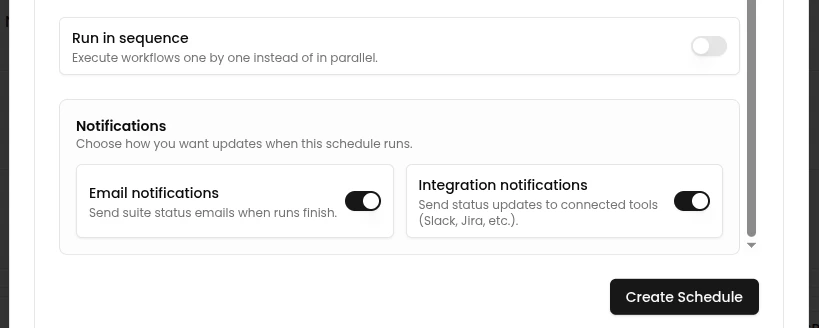
- Run Mode: Select Sequence or Parallel.
- Notifications: Toggle Email or Integration notifications.
🔄 Step 3: Update or Manage Your Schedule
You can later modify your schedule directly from the calendar view by clicking on an existing scheduled entry.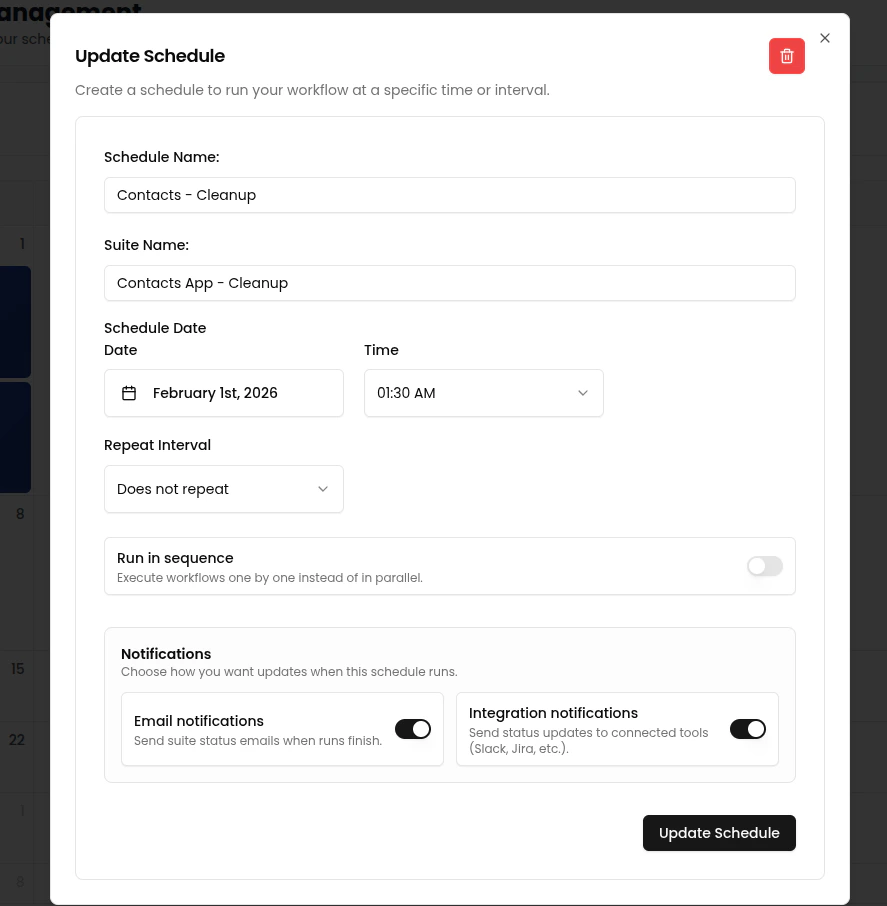
What You Can Update:
- Schedule name or suite name
- Run date or time
- Repeat interval
- Delete the schedule using the red trash icon
📧 Notification Details
When notifications are enabled, Nota sends emails after each scheduled run completes. The notification includes:- Run summary — total workflows run, passed count, failed count, skipped count
- Triage breakdown — if failures include triaged results, the email highlights the count of Real Bugs and Env Failures separately, helping you prioritize which failures need immediate attention
- Direct links — click through to view the suite results, filtered by status
For more on how failures are categorized, see Triage Categories.
📌 Notes
- Scheduled workflows run automatically based on your selected interval.
- Edits are reflected immediately in the calendar view.
- Deleting a schedule stops all future runs for that suite.