> ## Documentation Index
> Fetch the complete documentation index at: https://docs.trynota.ai/llms.txt
> Use this file to discover all available pages before exploring further.
# Use Cases
> The Workflow page is where you create, manage, and execute test workflows for your web application. You can build workflows manually or leverage AI to generate them automatically.
# Advanced Use Cases
**Workflows** can handle advanced and complex scenarios. Below are examples of advanced use cases and tips on crafting workflows tailored to your own applications.
***
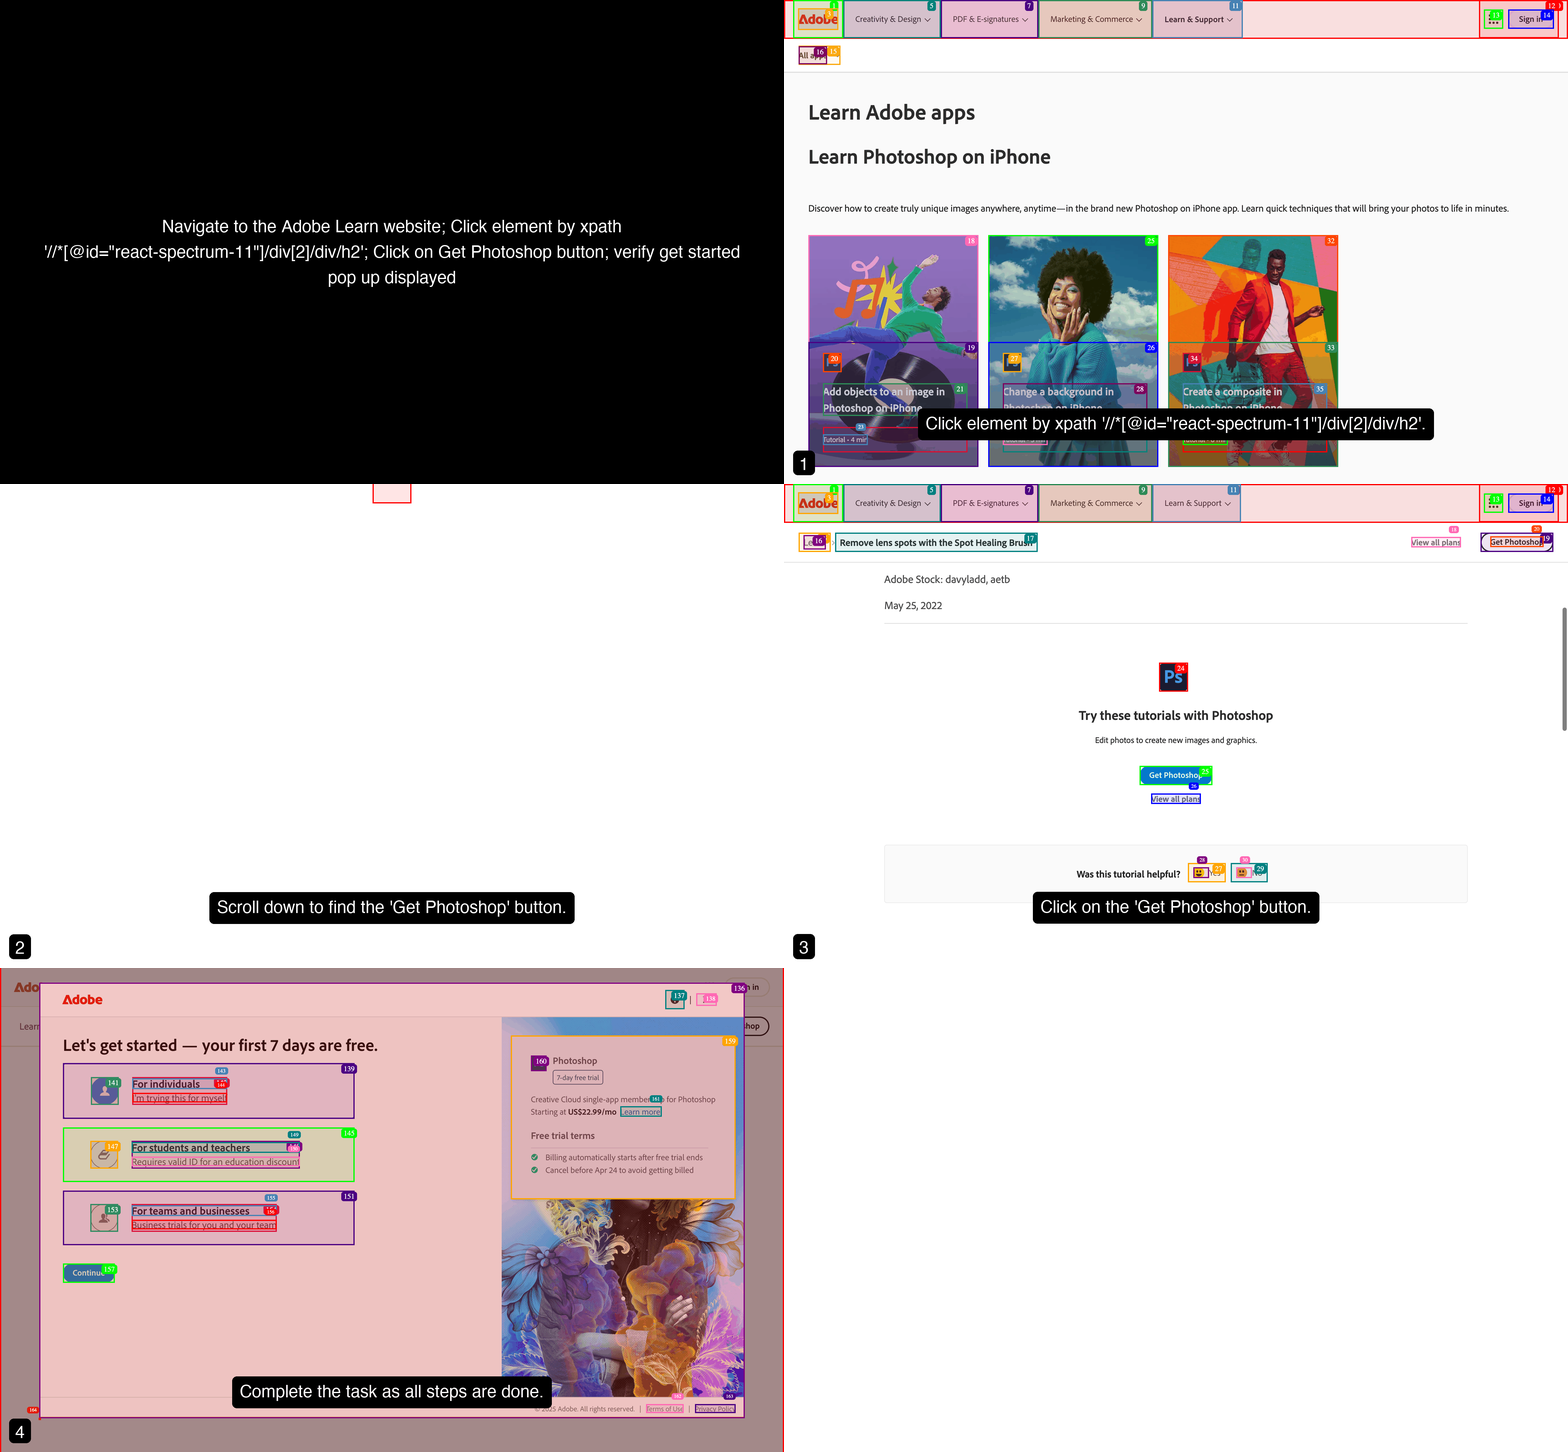
### 1. Click Action via XPath
**Prompt:**
```plaintext theme={null}
Navigate to the Adobe Learn website; Click element by xpath '//*[@id="react-spectrum-11"]/div[2]/div/h2'; Click on Get Photoshop button; Verify 'Get Started' pop-up is displayed
```
 ### 2. Two-Factor Authentication (2FA) - Email
**Prompt:**
```plaintext theme={null}
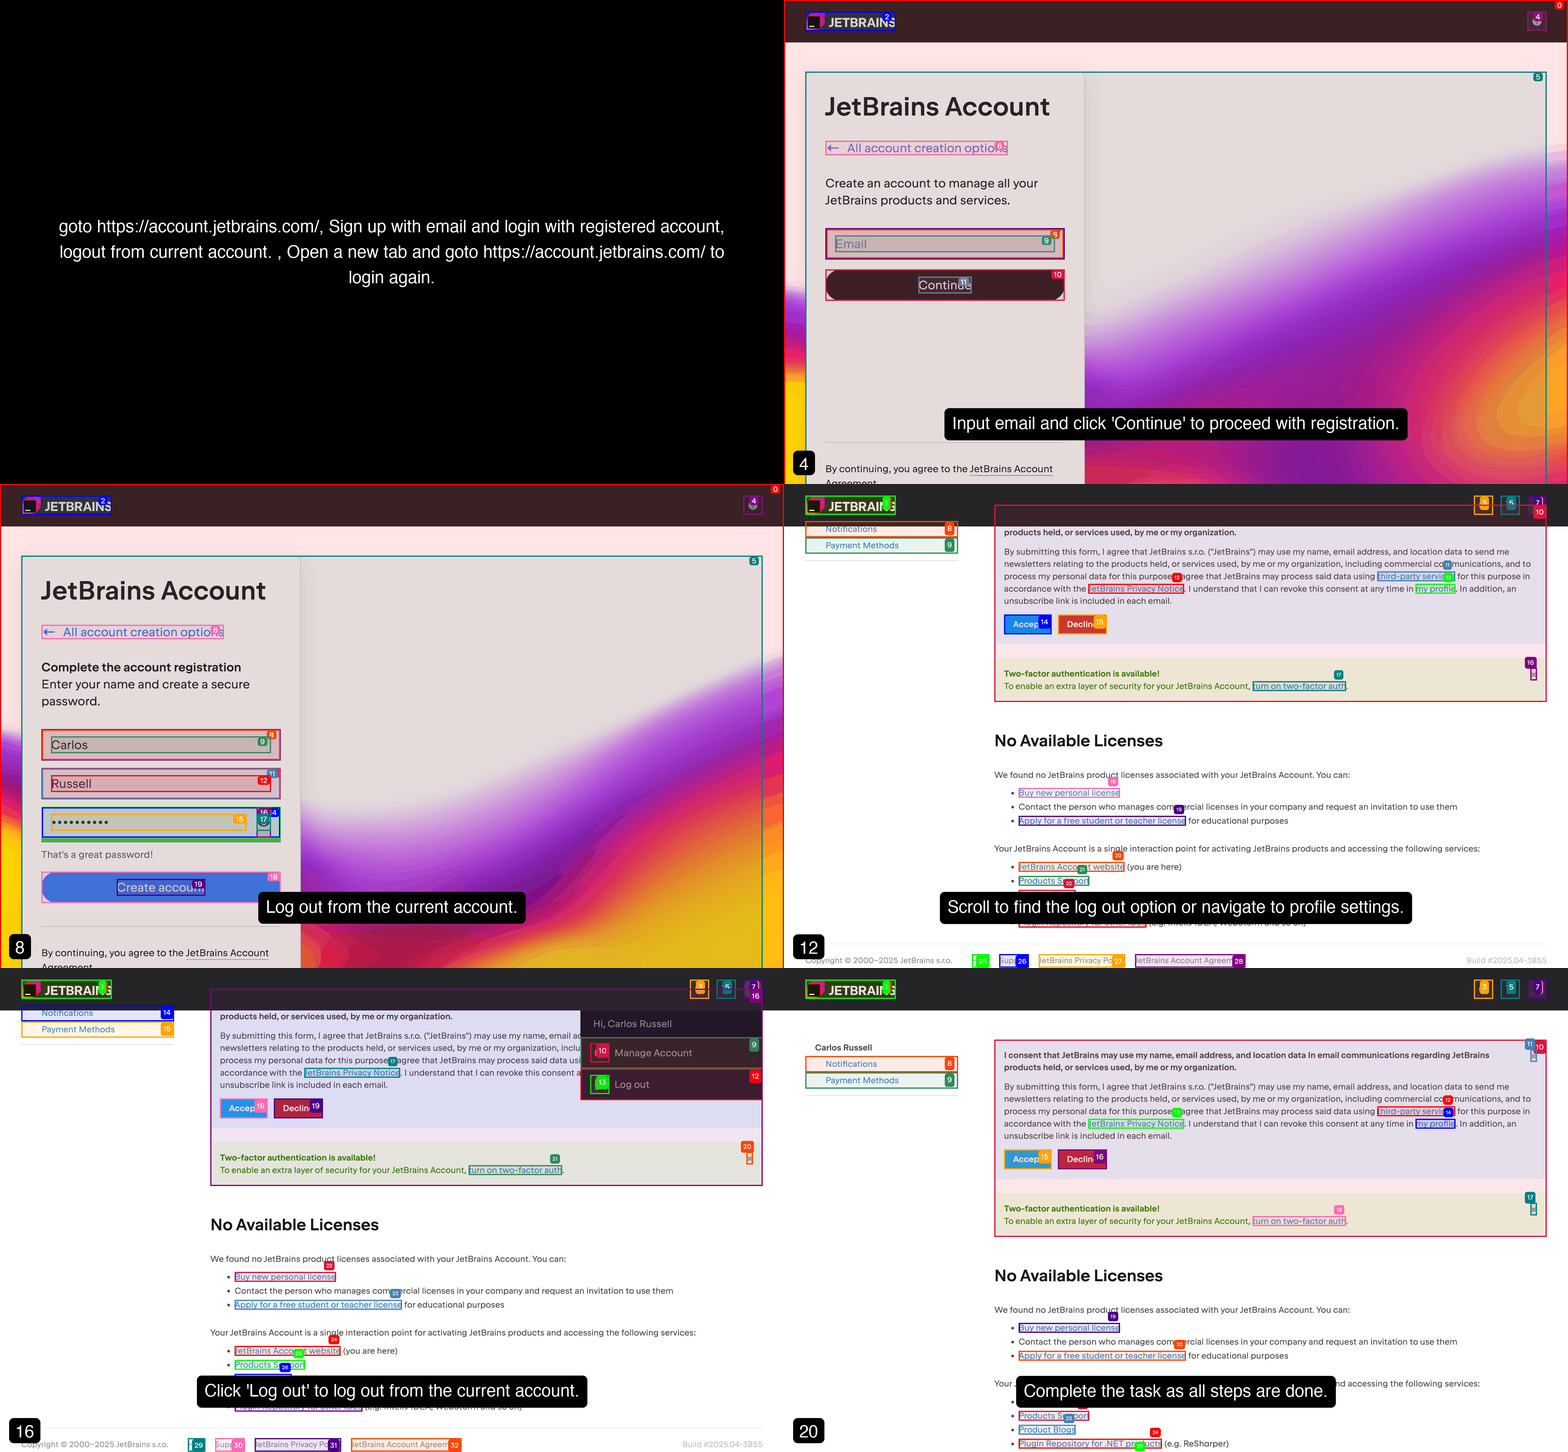
Go to https://account.jetbrains.com/, sign up with email and log in with the registered account; log out; open a new tab and return to https://account.jetbrains.com/ to log in again.
```
> We have configured our agent to work with `0dfx.email` service, where it can watch for the inbox activity.
### 2. Two-Factor Authentication (2FA) - Email
**Prompt:**
```plaintext theme={null}
Go to https://account.jetbrains.com/, sign up with email and log in with the registered account; log out; open a new tab and return to https://account.jetbrains.com/ to log in again.
```
> We have configured our agent to work with `0dfx.email` service, where it can watch for the inbox activity.
 ### 3. Hover and Click Action with CSS Selector
**Prompt:**
```plaintext theme={null}
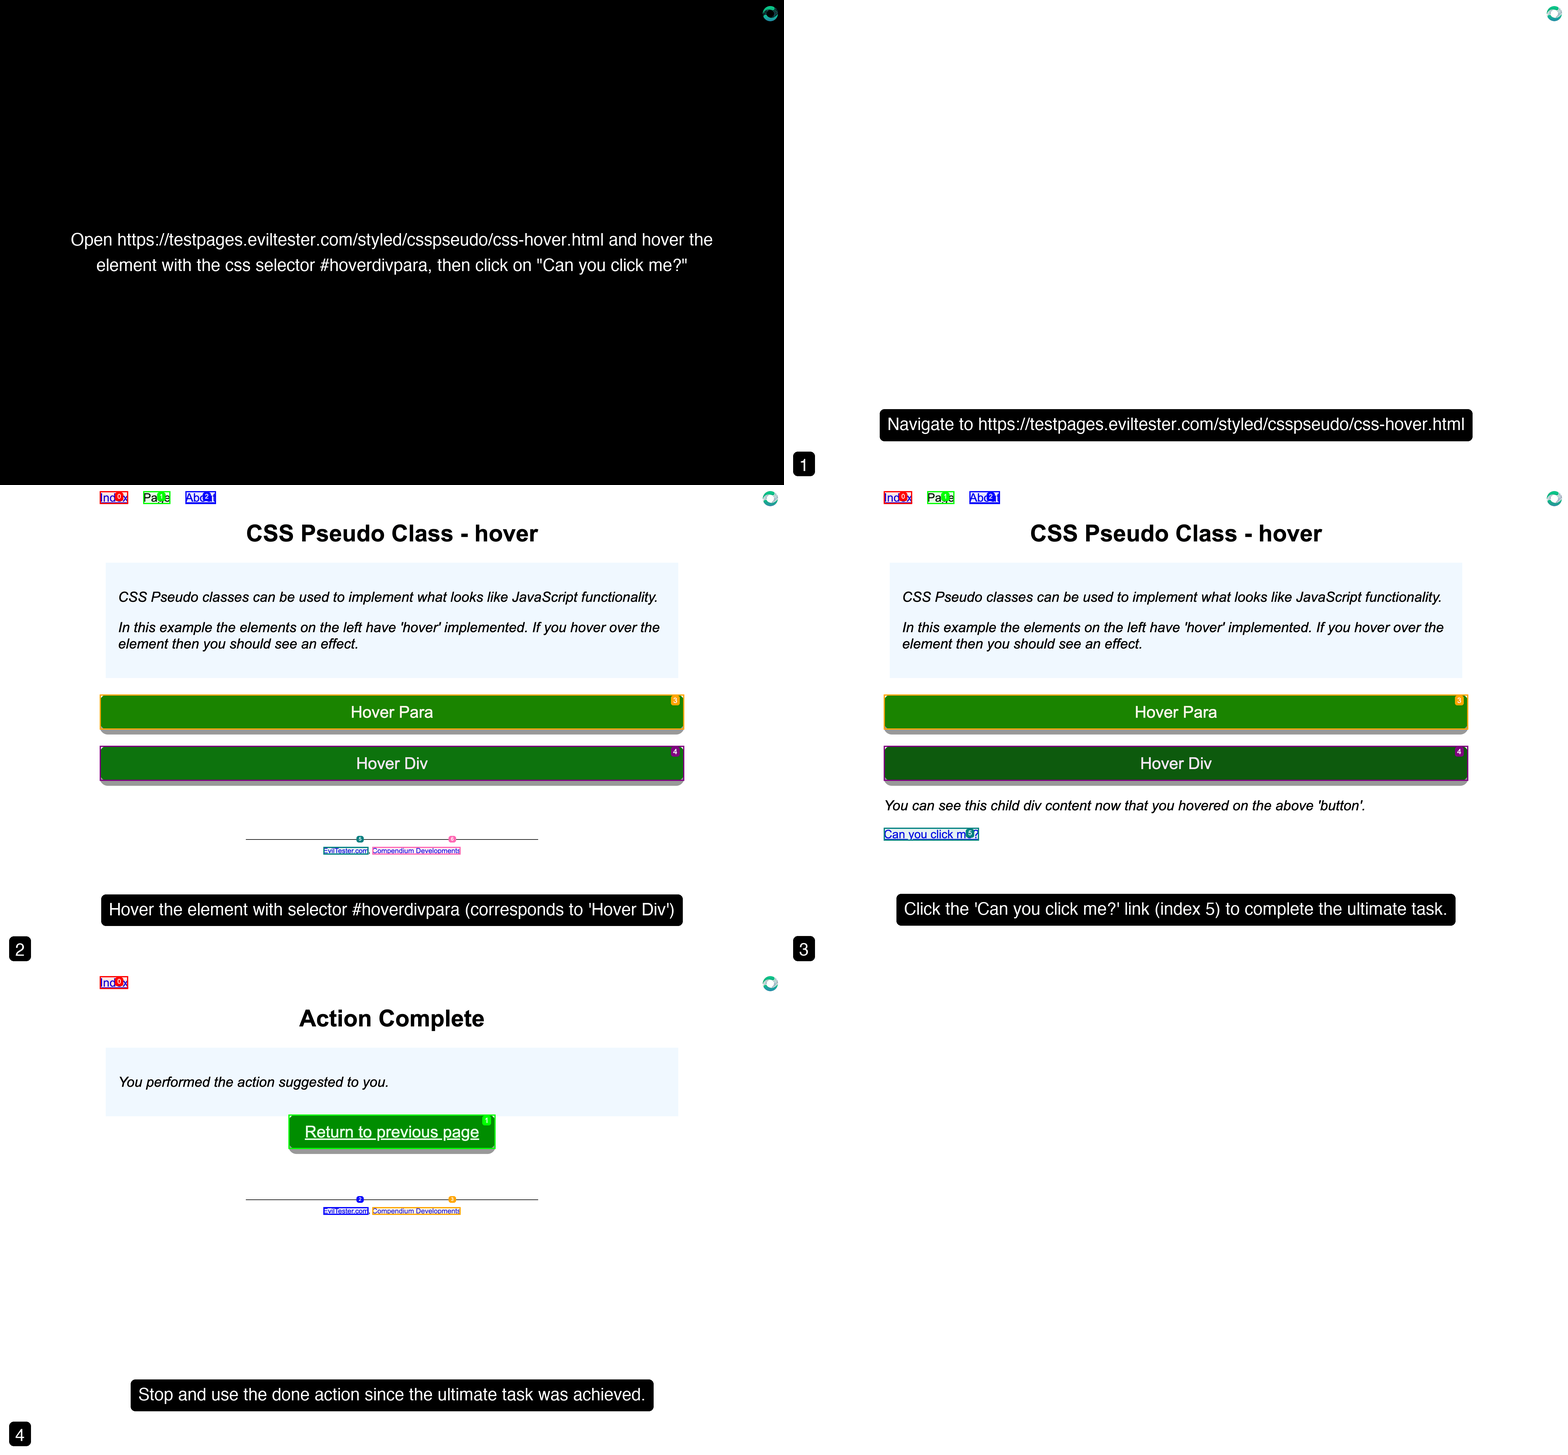
Open https://testpages.eviltester.com/styled/csspseudo/css-hover.html and hover the element with the css selector #hoverdivpara, then click on "Can you click me?"
```
### 3. Hover and Click Action with CSS Selector
**Prompt:**
```plaintext theme={null}
Open https://testpages.eviltester.com/styled/csspseudo/css-hover.html and hover the element with the css selector #hoverdivpara, then click on "Can you click me?"
```
 ### 4. Download and Summarize XLSX File
**Prompt:**
```plaintext theme={null}
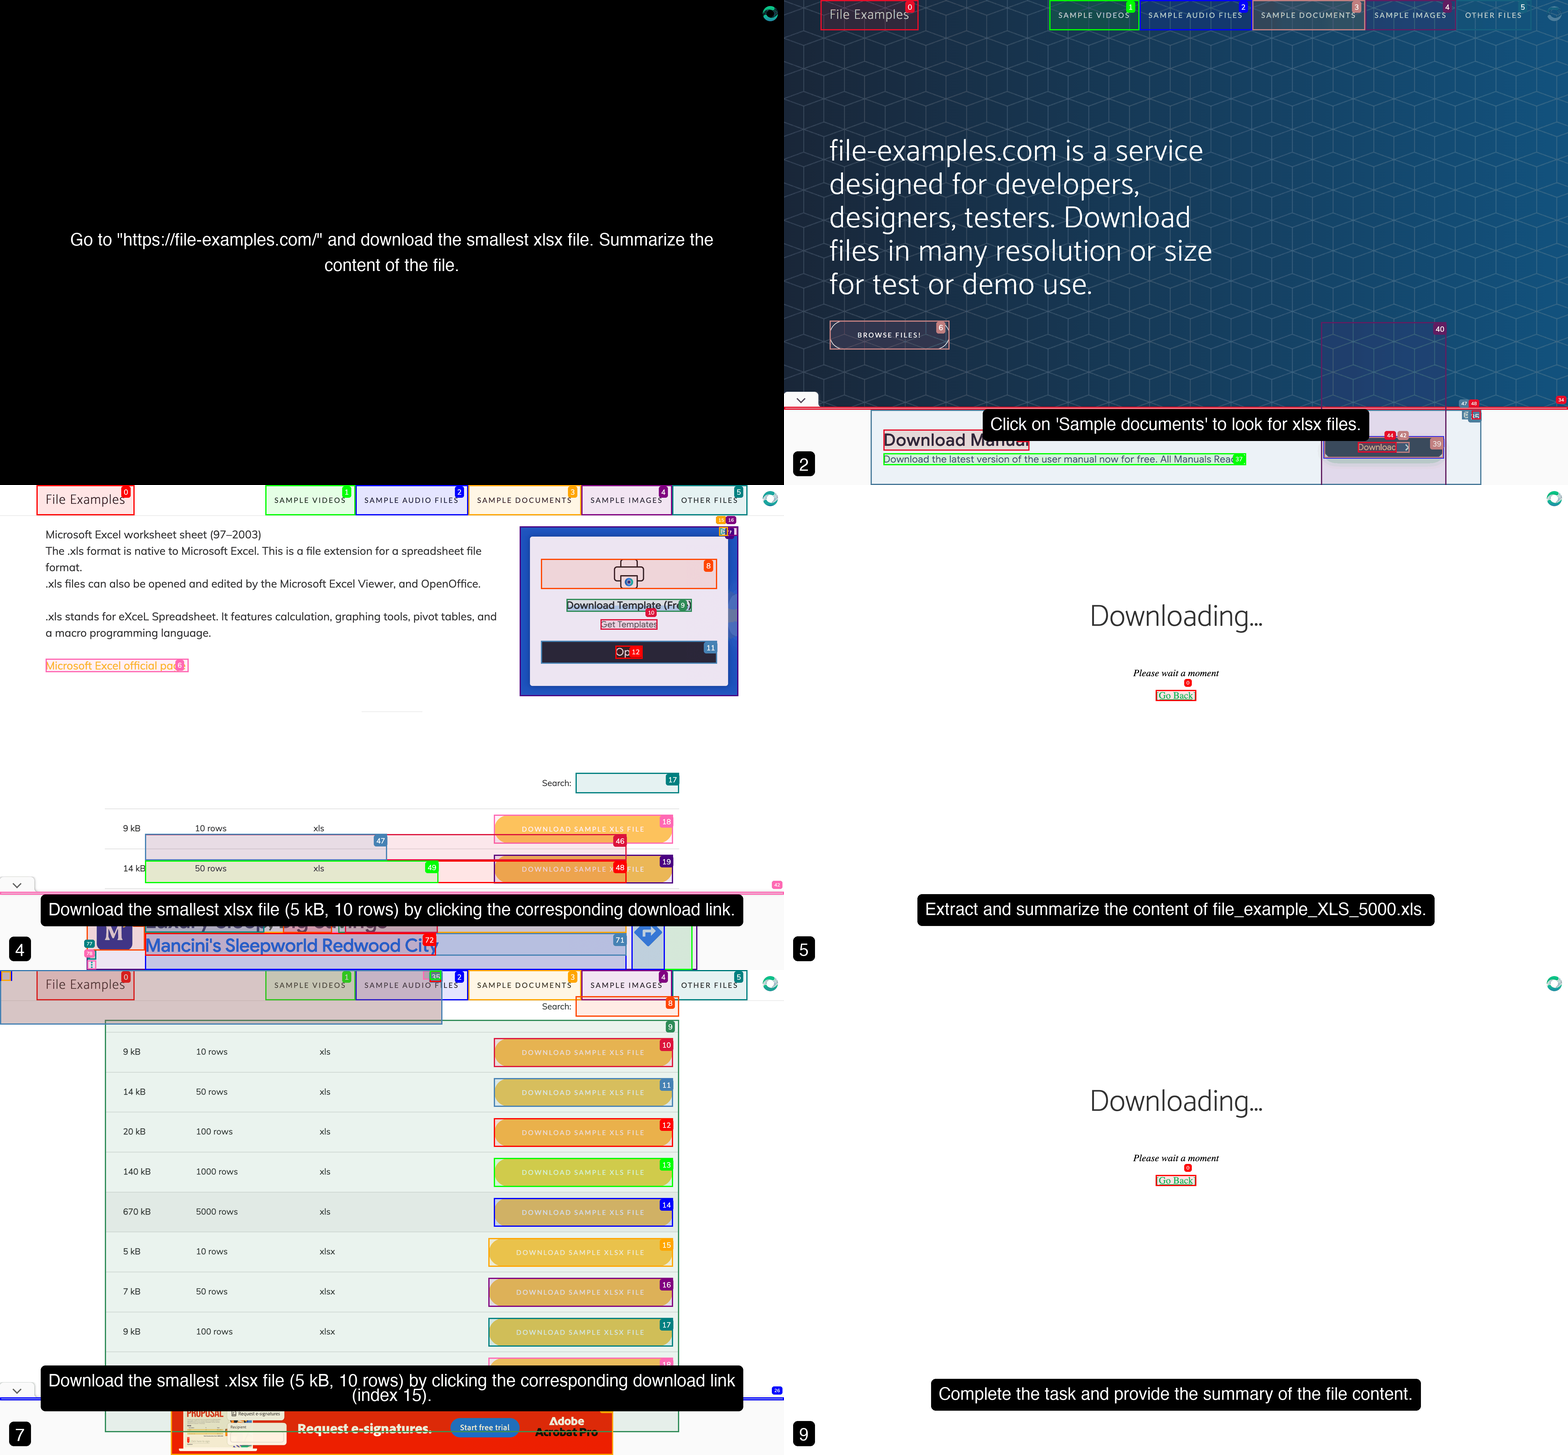
Go to "https://file-examples.com/" and download the smallest xlsx file. Summarize the content of the file.
```
### 4. Download and Summarize XLSX File
**Prompt:**
```plaintext theme={null}
Go to "https://file-examples.com/" and download the smallest xlsx file. Summarize the content of the file.
```
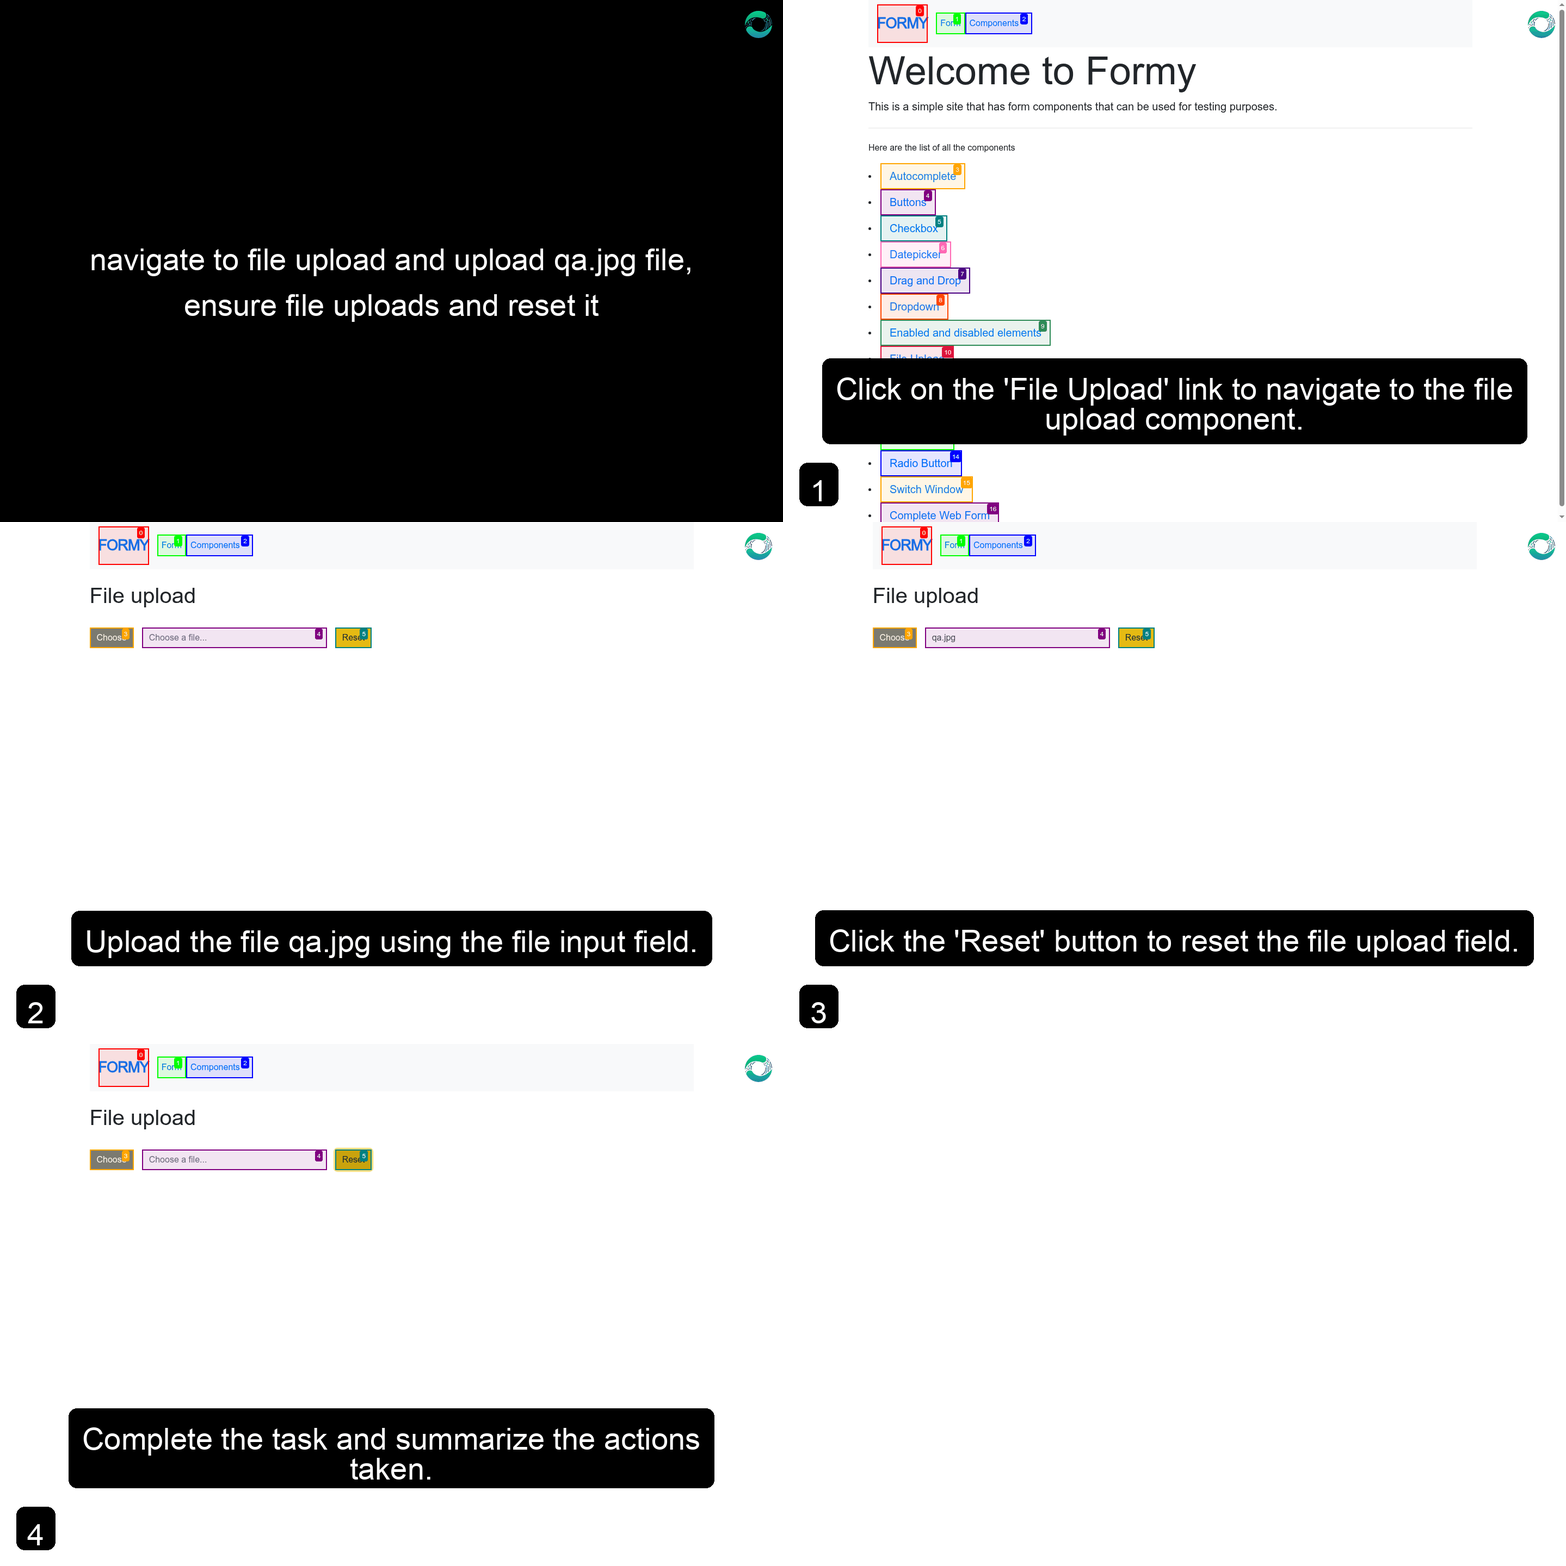
 ### 5. Upload a given file and reset it
**Prompt:**
```plaintext theme={null}
Go to "https://formy-project.herokuapp.com/" and navigate to file upload and upload qa.jpg file, ensure file uploads and reset it
```
> We uploaded the qa.jpg file as test data using the File Upload section on the Settings page.
### 5. Upload a given file and reset it
**Prompt:**
```plaintext theme={null}
Go to "https://formy-project.herokuapp.com/" and navigate to file upload and upload qa.jpg file, ensure file uploads and reset it
```
> We uploaded the qa.jpg file as test data using the File Upload section on the Settings page.
 You’re now ready to **execute or automate** your AI Agent workflow! 🚀